Sunday, July 29, 2007

Warped back & Dolphin bridge - Day 3

DAY 3 - (HOURS: 1.15, TOTAL TIME: 6.40HRS)

As you can guess by the name of the post, the back was warped when I came back the next day.

We had a particularly humid and wet day on Friday, and today, being Saturday, the sun came out and warped the back!

You can buy small humidifiers and gauges on stewmac.com to avoid this happening. But generally speaking, if your woods are properly kiln dried(which this one obviously wasn't) and you don't live in a climate that suffers drastic changes, you don't need to spend money on these.

I cut the rough shape of the back, as I did in the previous post with the top, and i used the same method and template. I didn't attempt to take down the thickness as the Rosewood is proving to be quite resilient to planing, sanding or anything else I try! More on that later....

Using the template I made already, I traced the soundhole shape onto the top:

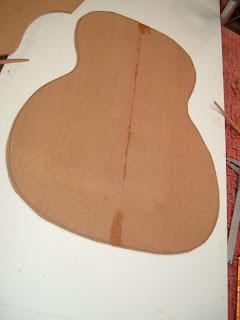
- if you've traced correctly, and kept the central lines together, the point of the compass will land perfectly on the glued central line.

An here's my plan for the bridge, which I briefly mentioned, and glued, in the previous post:


- with the bridge and headstock you can usually try your own designs. I'm going way out there with mine! But that's half the beauty of making the instrument yourself, making it your own, putting your own flare and ideas into it.


I spent a lot of time trying things today that didn't really give me the results I wanted. I don't feel this is wasted time in anyway, I'm constantly learning, and it's a great feeling to exhaust other methods before finding the right one, you know you've done all you can to make it as good as it can be.

Here's a couple of pics of things I tried that didn't have the desired results:

- marking out a template for a neck that I've decided not to use.


- planing the sides down by 0.00000000000000067mm!!!!

- a Dolphin too fat.

Shaping Soundboard & Joining back - Day 2

So the next day, being Friday, I went and did a wee bit more.
DAY TWO - (HOURS: 3.25HRS, TOTAL TIME: 5.25HRS)


I started by joining the back together, using the same method as the post below for joining the top, so I won't go into it again!

Here's a picture of the gorgeous Madagascar Rosewood:


Following that, I had the piece of Madagascar Rosewood for the bridge in my hand for some reason, so I said "Why not glue this in the shape I want it!"

- I'll explain later what I'm doing with this piece, and why it's in such an irregular rough shape...


So back to the soundboard.

I Started off work with the top today by tracing a template from the plan I had for the "OOO guitar" I then cut this out and traced around it:


- I should stress at this point you must line up the central line on the template(make sure you trace that too!) with the glued line on the soundboard, this is to keep the grain uniform with the direction of the guitar body. Make sure you stick tape that template to it before you start tracing :)

She went under the saw again for the next step. Leave the cut 3mm proud of the outline:


Be-a-utiful.

The last step for the day was to plane the thickness of the soundboard. It's usually 2-2.5mm for a soundboard. But this is Cedar, which is a softer wood, so 10%-15% is added to that thickness. I hand planed it down to 3mm. It's a little thick still, but I will be sanding down the other side anyway later on in the process. Clamp one end of the board, using a flat piece of scrap wood to avoid clamp marks in the wood.

Here's a couple of pics:


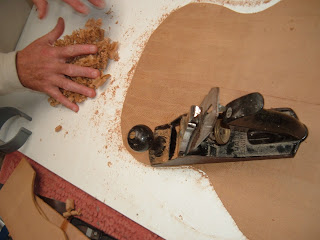
- and that was it for the day.


Wednesday, July 25, 2007

Working On The Soundboard - Day 1

I started work on the guitar on Thursday 19Th July 2007.


I spent about an hour placing all my bits and pieces around the workshop, it's good to have a place for everything when you start out, it makes cleanup and awful lot faster.


I spent about 2 hours working on the guitar itself.

Here's how I got on....


DAY ONE - (Hours: 2. Total time: 2hrs)


I clamped the two book matched pieces of Western Red Cedar together.
Then I used a plane to bring the edges level:


I used two pieces of scrap timber on either side to stop the jig pinching the wood, but also to widen the top surface and make it easier to keep the plane level. Having never used a plane before I wasn't as accurate as I had to be for this delicate job. I ended up using another method which may come in handy; leaving the clamps on, I taped a piece of sandpaper(I think it was 120grit) to the flat surface of the workbench and making sure to keep it level like so:


We continued to do it until the dust went from this:


To this:


- the reason being it was a flat surface afterwards whereas before it had a slight concave arc to it.

The next step was checking that they were a good match. Hold them up to a window or a light, pressing lightly together, check for a sliver of light coming through, it can occur in more than one place, if it does, back in the clamps with it!


This process actually took a good while, but trial an error is all part of it.


When I was happy with the sides I ran some Titebond glue down one side:


The last thing you do is find a clean flat surface, and lay a strip of wax paper down the same length as the pieces of wood, this is to stop the glue bonding the soundboard to your workbench!


Place a small strip of wood(1-2cm cubed and longer than the pieces of wood) underneath the middle of the soundboard & screw 3 screws in either side to keep up the "Peak" and make it as tight as you can. You'll damage the edges doing this, but you'll be cutting them off pretty soon anyway. It'll look like this:


- I should point out at this stage that these steps were all done BEFORE I put that glue on!!

Holding the sides level, press down along the glued edge until the two boards are flat. WARNING if you had the peak too high you could damage or even break the boards at this point, so be aware of the stress levels in the wood as you're applying pressure.

Finally I placed an old varnished windowsill on top of it, the varnish won't let the glue stick that much to it, and was easy to come off when we removed it the next day. To apply extra weight for the joining process I placed some stones form the garden on top of the windowsill.

24 hours.

24 hours you wait for the glue to dry.

24 hours for any glued joint to dry.

24 hours.

Take It From The Top...

So here we go!


I should start by saying where I got my supplies.


I used 3 different companies:


1. Soundboard & bracing wood: http://www.alaskawoods.com/alaskawoods/index.php


- this is a great website for soundboards. They deal mainly with spruce tops of the highest quality.


They're based in Alaska so shipping is a big factor, but all reports including my own say that the shipping is very fast: 5 days to me here in Ireland!


The quality of the soundboard I got was great. I ordered a Western Red Cedar top:


The grain was amazing, stiff & no blemishes. It really was a mastergrade top.


The blanks were 5mm thick.


Cost: Mastergrade Cedar Top Was $47.00.


Sitka Spruce Bracewood was $6.00.


Shipping was $43.20 - TOTAL: $96.20.


- Please note there is a minimum shipping order of $50.00 from Alaska Woods.


2. Back & sides, fretboard, headplate, trussrod, rosette, kerfings, scratchplate, binding, nut blank, fret wire, bridge blank, abalone 6mm dots and mahogany neck and heel blanks were all bought from: http://madinter.com/b2c/index.php?idioma=2


Cost: Back & Sides Madagascar Rosewood(Mastergrade) was €130.00.


White-Green-White Madagascar Rosewood Binging was €10.00.


4.76mm Bone Nut was €4.95.


Transparent Scratchplate was €4.50.


Blank Neck & Heel Mahogany was €4.50. - The cheapest I've seen online.


Madagascar Rosewood Bridge Blank was €2.50.


Ebony Fretboard was €12.50.


Fret Wire(2.5mm) was €3.40.


Madagascar Rosewood Headplate was €2.50.


6mm Dots Abalone - €0.75 each.


Kerfings of Cedarwood(Please note these kerfings are not the normal kerfings for a steel string acoustic - I wouldn't recommend them) €8.00


Trussrod was €8.95.


Rosette was €19.00.


- Please note all these prices are not including VAT. Shipping was €42.97 (Since ordering they have added two cheaper shipping companies, it was just TNT when I ordered)


Total: €262.77 plus Vat @16% - €304.81($421.64)


3. I went to http://www.stewmac.com/ for the rest.


I actually made two orders from them.


Order 1 was just two items:


Cost: Blank Tusq Saddle: $5.68


Grover Chrome Tuners: $49.49


Shipping was $15.63. TOTAL: $70.80(€53.48)


Order 2 was a lot more!


Cost: Curly Koa Binding: $17.98.


Plan For a Triple-O Guitar: $12.45.


Titebond 16oz Glue: $8.83.


Reverse kerfings Mahogany: $21.84.


Binding Tape: $2.56.


Super Glues X3 (Thin, Medium, & Thick) - $16.38.


Trussrod: $13.89.


Blank Saddle & Nut Tusq: $12.38.


Large Abalone Diamonds X4: $1.90 Each.


Abalone Sidedots Set: $5.71.


Bridgepins Snakewood: $12.16


15inches of Straight Abalone Purflings: $15.78.


Adhesive sheet for Scratchplate: $1.86.


Bridgeplate: $3.25.


SUNDRIES:


Polishing Pad: $13.95.


Polishing Compound #3 & #4: $34.00.


Safety Kit(Nitrile 500 Gloves Box, Safety Glasses, Earmuffs & 5 vented Dustmasks) - $55.66.


Shop Apron: $12.95.


TOOL RELATED:


Reamer 5-degree For Bridgepin Holes: $47.28 - (The only tool I bought!!!)


1/32in Dremel inlay heads(6): $9.71.


Shipping was $51.09. TOTAL: $377.19(€278.19)


That's pretty much it!


As you can see I bought a lot of stuff that wasn't really necessary.
For Example: 2 Trussrods, 2 Nuts, 2 Saddles, 2 sets of kerfings, various superglues, A LOT of Abalone, shop apron, gloves etc. The Rosette I got was also very extravagant:


That's a lot of detail & separate pieces of wood. It's also very fine cuttings on all the Mother of Pearl too.

Combining the 2 Stewmac orders would have saved me some shipping too - it pays to make a definitive list of what you need before you order anything. Sometimes the thrill of getting your woods and starting will cause you to forget things you may need further on in the job.

Tools for the job are extremely expensive.
Luckily I have a good friend that has already made a few guitars, he has let me use his tools & his workshop for my endeavour. He also has provided invaluable guidance and help.

If your not so lucky, I would encourage you to try make as many tools as you can yourself, jigs and moulds and the like can all be made at home and can be just as effective as factory made ones, if not more effective as you can make it to the exact specs that you want.

However, if you are to buy the tools, buy the best you can afford, inferior tools will lead to an inferior product. Tool maintenance is vital as well, and keep yourself familiar with all the tools required. If you're not comfortable with a tool, don't start working on you guitar with it, try getting results on another piece of scrap wood first. Confidence with a tool will make it all the more enjoyable and rewarding.

Well that's all I've time for, better get back to working on this guitar!

Saturday, July 21, 2007

Breaking the ice

....or the wood!
Well I've got this setup so all I've to do now is post to it.
Call back soon for pics and stories on the rewarding, slow process I've set out to do.