DAY 7 - (HOURS: 4.00, TOTAL TIME 17.30HRS)Day 7.
Where to start...
OK a small bit of
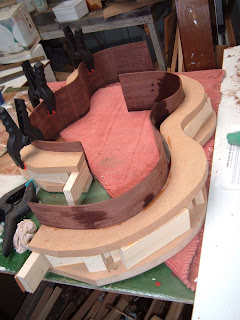
chiseling was done on the mould to cut back the pine pieces to size:
 - one of the end pieces hadn't really stuck that well, so nails were promptly hammered in to keep her in place. The beauty of the mould is that it can be made quiet quickly in parts, as every stage doesn't require the neatness of the actual instrument itself. In other words, you can be a bit slack in parts if you want!
 - all edges are level now.

- the end pieces took a good hammering at this stage. They'll get over it though!
So that all went fine.
But the rosette didn't.
I should start by showing you how the router was rigged to fit the rosette routing tool, which it didn't actually fit.
Have a gawk:

- when you buy a
soundhole/rosette routing kit from
stewmac(at almost 37euro) this is what you get. A we piece of metal with an
adjustable length for routing different sized circles. You get two screws to attach it to the standard sized router. You also get a small 3/16" bar that acts as the fulcrum.
 - it's not the worst price I suppose. A lot of the speciality tools are usually extremely expensive. But the problem we had with this is that the dimensions for the holes that join it to the router were of an incorrect width. Maybe you have to buy a certain brand, or maybe you have to buy stewmacs one. Either way, we had to create a makeshift connection between the two. It's not a good idea to do this, I wouldn't recommend it. But if you find yourself in this situation, maybe you can learn from the way we did it, and tips would be greatly appreciated on another method!

- a thin wedge was made to screw the rosette tool into on the bottom.

- measuring up the holes.

- the tool was affixed to the wedge.

Tony had to take apart the bottom of the router to allow the surface to be flush with the wedge.
 - once we had that done, the top came off to screw screws into those two holes you see either side of the drilled hole.
 - one rigged router coming up!
 - the depth was set at 0.9mm to create the bed for the rosette to sit in. The rosette I bought was 1.2mm thick. We tested it on an off-cut of the Mastergrade Cedarwood to make sure it would go swimmingly. It's worth mentioning here to keep all pieces of wood you cut off, no matter how small. OK not wood shavings! But even pieces a few millimetres thick can serve as wedges for joint etc.
The last thing to do today was mark the top for routing and proceed with doing it.
This, I'm afraid, didn't go according to plan.
Check it out:

- I had the template drawn on the opposite side, but then I opted to make this side the front. I pushed a pin through where the centre of the
soundhole was and went about making circles.

- I made three. One for the exterior of the rosette, one for the
interior, and one where the
soundhole edge will be.
It's worth pointing out that the rosette I got was too small to facilitate the
soundhole size in the '
OOO' plan, so I
just went and made my own size. It won't affect the structure as it is a smaller hole.

- a 3/16" hole was drilled through the soundboard, and through the piece of
MDF underneath. This left
approximately 11mm of the bar above the soundboard - more than
enough for the tool to rotate about.

- or maybe it was more like 18mm! It doesn't look straight up in this photo but I assure you it is. It's important that it's straight as the tool won't rotate properly if it's to one side.

- beautiful!

- So everything went grand until now...

- somehow the setting for depth slipped. It went straight through the soundboard and even into the
MDF. The reason so much was done before it was seen, was because of the rigged tool obstructing the view.
 - the good thing about a serious error like this, is that the rosette will cover it anyway. So going back to the off-cut of Mastergrade Cedar, a piece was cut out and shaped to fit the hole. Note that the grain is running in the same direction on both pieces. Don't forget to do that, especially if it's not going to be hidden.
 - doing a dry-fit check on it.
 - sawdust from cutting the shape of the top is used to create a paste. A mixture of roughly one part glue to two parts dust was used. It creates a nice thick gritty paste somewhere between toothpaste and blu-tack. I know I said before to not keep wood shavings, I should've said keep the dust from what you do as well. Hopefully no one was hurt ;)
 - with a piece of wax paper left underneath. The 5mm thick wedge is placed in, protruding on either side.
It's left to dry, and I'm left to stew!
 - it should be behind the kerfing hopefully, so that will give it some strength when it's all together.


 - I ran the bridge under the


 - as the ends of the mould were not
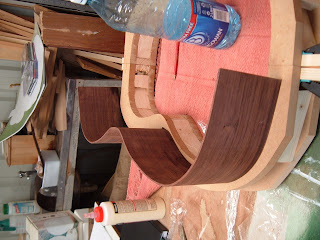
  - even without it being fine sanded, the back and sides are shining.
 - a bit blurry, but you can see the contrasting colours in the Madagascar Rosewood.


 Tony had to take apart the bottom of the router to allow the surface to be flush with the wedge.
 - once we had that done, the top came off to screw screws into those two holes you see either side of the drilled hole.

 - I had the template drawn on the opposite side, but then I opted to make this side the front. I pushed a pin through where the centre of the


 - with a piece of wax paper left underneath. The 5mm thick wedge is placed in, protruding on either side.